Editing Your Website Pro Site With Divi Builder
Getting your business up and selling is possible with Website Express. This powerful product allows you to quickly and easily create a website and online store powered by WordPress and WooCommerce. To make the transition to ecommerce seamless, we also have a visual builder, called Divi Builder, within every Website Express account. This allows you to design and create beautiful websites without having to write a single line of code.
Before we jump in, let’s make sure we’re familiar with Divi Builder.
Divi Builder is a WordPress plugin that allows you to insert, remove, and edit content blocks on the front end of your website. It boasts unlimited layout possibilities, and its fluid content areas are perfect for a responsive design approach. It allows those site owners with little or no design, or development experience, to create beautiful sites, with a simple drag and drop interface.
Let’s start editing your website using Divi Builder!
Accessing Divi Builder
On the Website Express/Pro dashboard, there is a button, “Edit My Site“. Click it to start editing the front end, or the content of your website.
Editing text and images on your website
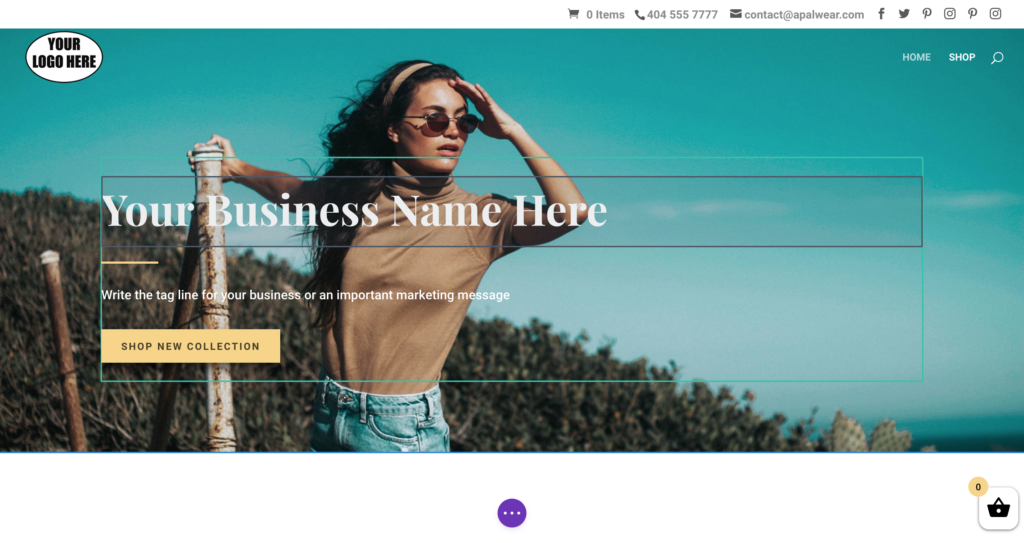
- It’s time to customize your site! Let’s start with text elements. Click on the text box you’d like to edit and start making changes.
- Alternatively, when you hover over an element, a small dark toolbar will appear. Click on the gear icon to pull up a window that provides more options for editing and customization. Click on the window’s green checkmark to save any changes.

- This same process also works with any buttons on the page. However, as buttons have more options, you’ll need to open the editing modal to further customize it. You can do this by double-clicking the button, or opening it by clicking the gear icon in the same way that you did with the text box.
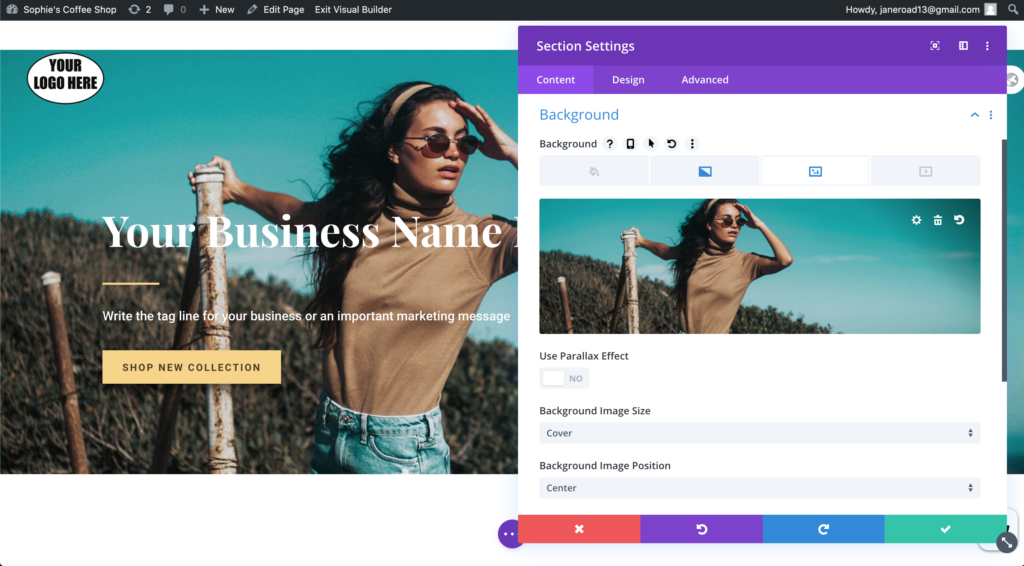
- Now it’s time for images! Many templates will have a large picture set as the background or banner across the top of the website. To change the image, simply hover over it (while not interfering with text or other elements) and double-click. An editing modal should pop up. Click on the “Background” section. Your current background image should be showing. Click the garbage can icon to delete the placeholder image and then click “Add image”. You can either drag the image from a file on your computer or click to browse your files.
- To edit other images on the site, simply double-click the image and replace it with your own.
Adding and removing elements on your website
- If there are any elements (text blocks, images, etc.) that you don’t want on your website, simply hover over the element and select the garbage can icon.
- If you want to add elements to your page, either:
- Hover over the area you’d like to add an element and click the grey “+”,
- Hover over the element above the spot you’d like your new element to be placed, and look for a green “+”. You may have to actually click on the element above for it to appear.
- This will bring up an “add row” selector with different options as to the number of columns in your new element. Perhaps you would like three blocks of text side-by-side? Choose the row with three columns. Maybe a wide picture on the right and a narrow text box on the left? Choose the row that shows the corresponding spacing. Just want something to go straight across your entire page? Simply choose the first option available, the one with a single column.
- A window will appear with several different element options. Search for the Image option to add a picture, the Text option for adding text, or browse to see what other options are available.
Saving your work and moving on to edit another page
- Once you’re happy with how your website looks, or every so often along the way, you’ll want to save your progress. Look for the purple icon with three dots at the bottom of your page and click it. The icon should multiply and you’ll now have several purple icons. You’ll also have a green “Save” button in the bottom right corner. Click it to save your changes.
- To edit another page (ex. the Shop page), click “Exit Visual Builder” at the top of your page. Once you’ve done so, you’ll see your page exactly as your customers will see it. Next, navigate to the page you’d like to edit next and then re-enable the visual builder using the button at the top of the screen.
Changing the logo and contact information on your website
- To change the logo and contact information in the top bar of the website you will need to navigate to the WordPress Dashboard. Click the name of your business in the top left corner of the screen. Once in your WordPress dashboard, in the left navigation bar click the Divi tab (towards the bottom of the side navigation menu).
- You are now on the General Divi Settings tab. The top row is where you are able to change the logo. Click the “Upload” button.
- Once you’ve uploaded your logo, scroll all the way to the bottom of the page and click the green “Save changes” button.
- Next, we’ll input your business’ contact information. Back in the left navigation. You may notice that the Divi Builder tab has extended to include several sub-headings. Click on “Theme Customizer”.
- A new page will load. This is an alternative editor. Click on the “Header and Navigation” section, and then “Header Elements”. The navigation bar should now contain two text bars for you to insert your business’ information.
- Click the blue “Publish” button at the top of the page to save your changes to your webpage.
Congratulations, you now have the knowledge you need to edit your website!
WooCommerce and Divi Builder have extensive documentation and tutorials on how to set up, edit, manage, and operate your store.
Related Articles
Technical Specifications for Website Pro
Website Pro is a high-performance, DIY website offering that allows you to build and manage your own website. Unlimited Page Views: Website Pro doesn’t penalize high-performing websites, therefore the product allows for unlimited visitors to your ...How to point a New GoDaddy domain to Website Pro
If you recently purchased the domain (or just have never pointed your domain to a site), then these instructions should allow you to point your domain to your Website Pro site. These less specific Domain connection Instructions might be more helpful ...What is the Difference Between Website Pro and Standard?
The difference between Website Pro and Standard is mainly in the business layer rather than technology. Currently, Pro and Express websites are all hosted on the same platform, sharing the same computational resources. However, there are a few ...Using Website Standard to set up a free website and online store
Website Standard allows users to quickly and easily create a free website and online store powered by WordPress and WooCommerce. Read this article for an outline of the steps needed to set up Website Standard. Setting a subdomain When users first ...How to point a domain from your old host to Website Pro
If your domain is currently pointing to a site on another host, then these instructions should allow you to point your domain to your Website Pro site, with zero downtime. Follow these more specific GoDaddy Domain Transfer Instructions if your DNS ...